Obtain your OAuth client credentials
This document provides a comprehensive overview of obtaining a Zuora Billing OAuth Client ID and Secret. The process involves identifying your Zuora administrator, accessing your Zuora tenant, and determining the correct REST endpoint. Following these steps will ensure you have the necessary credentials to make REST API calls successfully.
Process Overview
You need to do three things:
- Identify your Zuora administrator
- Have them grant you access to a Zuora tenant
- Determine the correct REST endpoint for this Zuora tenant
Step 1
Inform your administrator that you require access to both the Zuora user interface and an OAuth client ID and secret. Only your company’s Zuora administrator, not Zuora, can provide these. Depending on your implementation setup, you may receive a "Welcome" email prompting you to set your password, or you will be provisioned using your company’s SSO provider. If your organization is using OneID and your Administrator needs guidance on creating an account for you, share this video that walks through the necessary steps with them.
Step 2
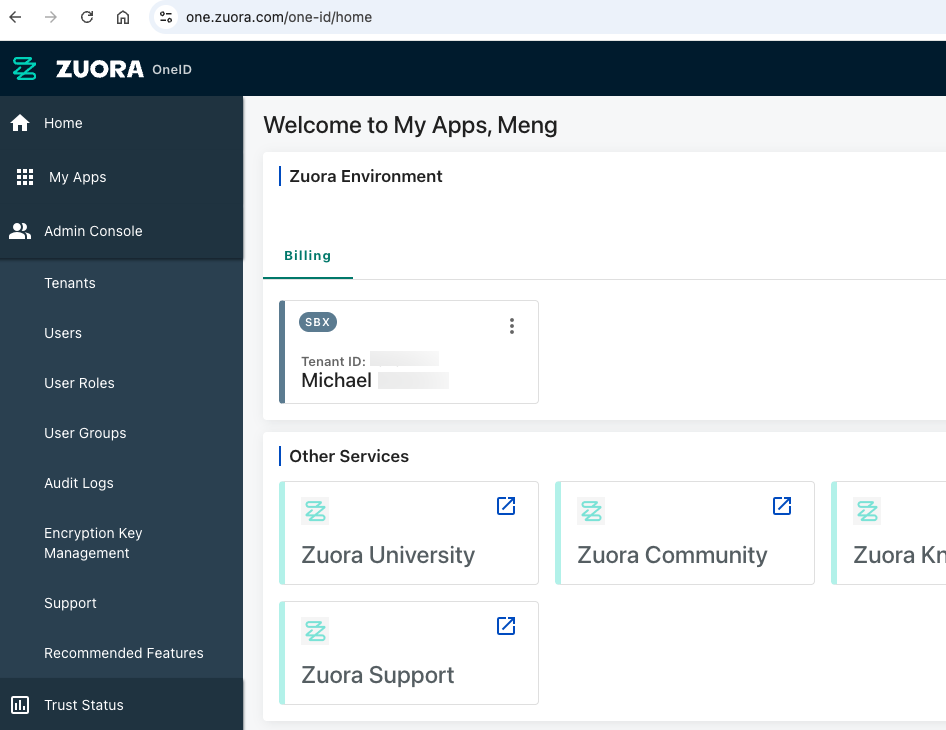
Once you have set your password or connect through your SSO, you should see a page similar to this one:
Your administrator must create OAuth client IDs and secrets for each tenant you need API access to. If you are an administrator, you can self-provision following these steps. If you are not, and if your administrator is unfamiliar with setting up OAuth clients, share this process with them. You can easily check to see if you are already an administrator.
Step 3
Click the tenant panel to go to the tenant home page, which looks similar to this:
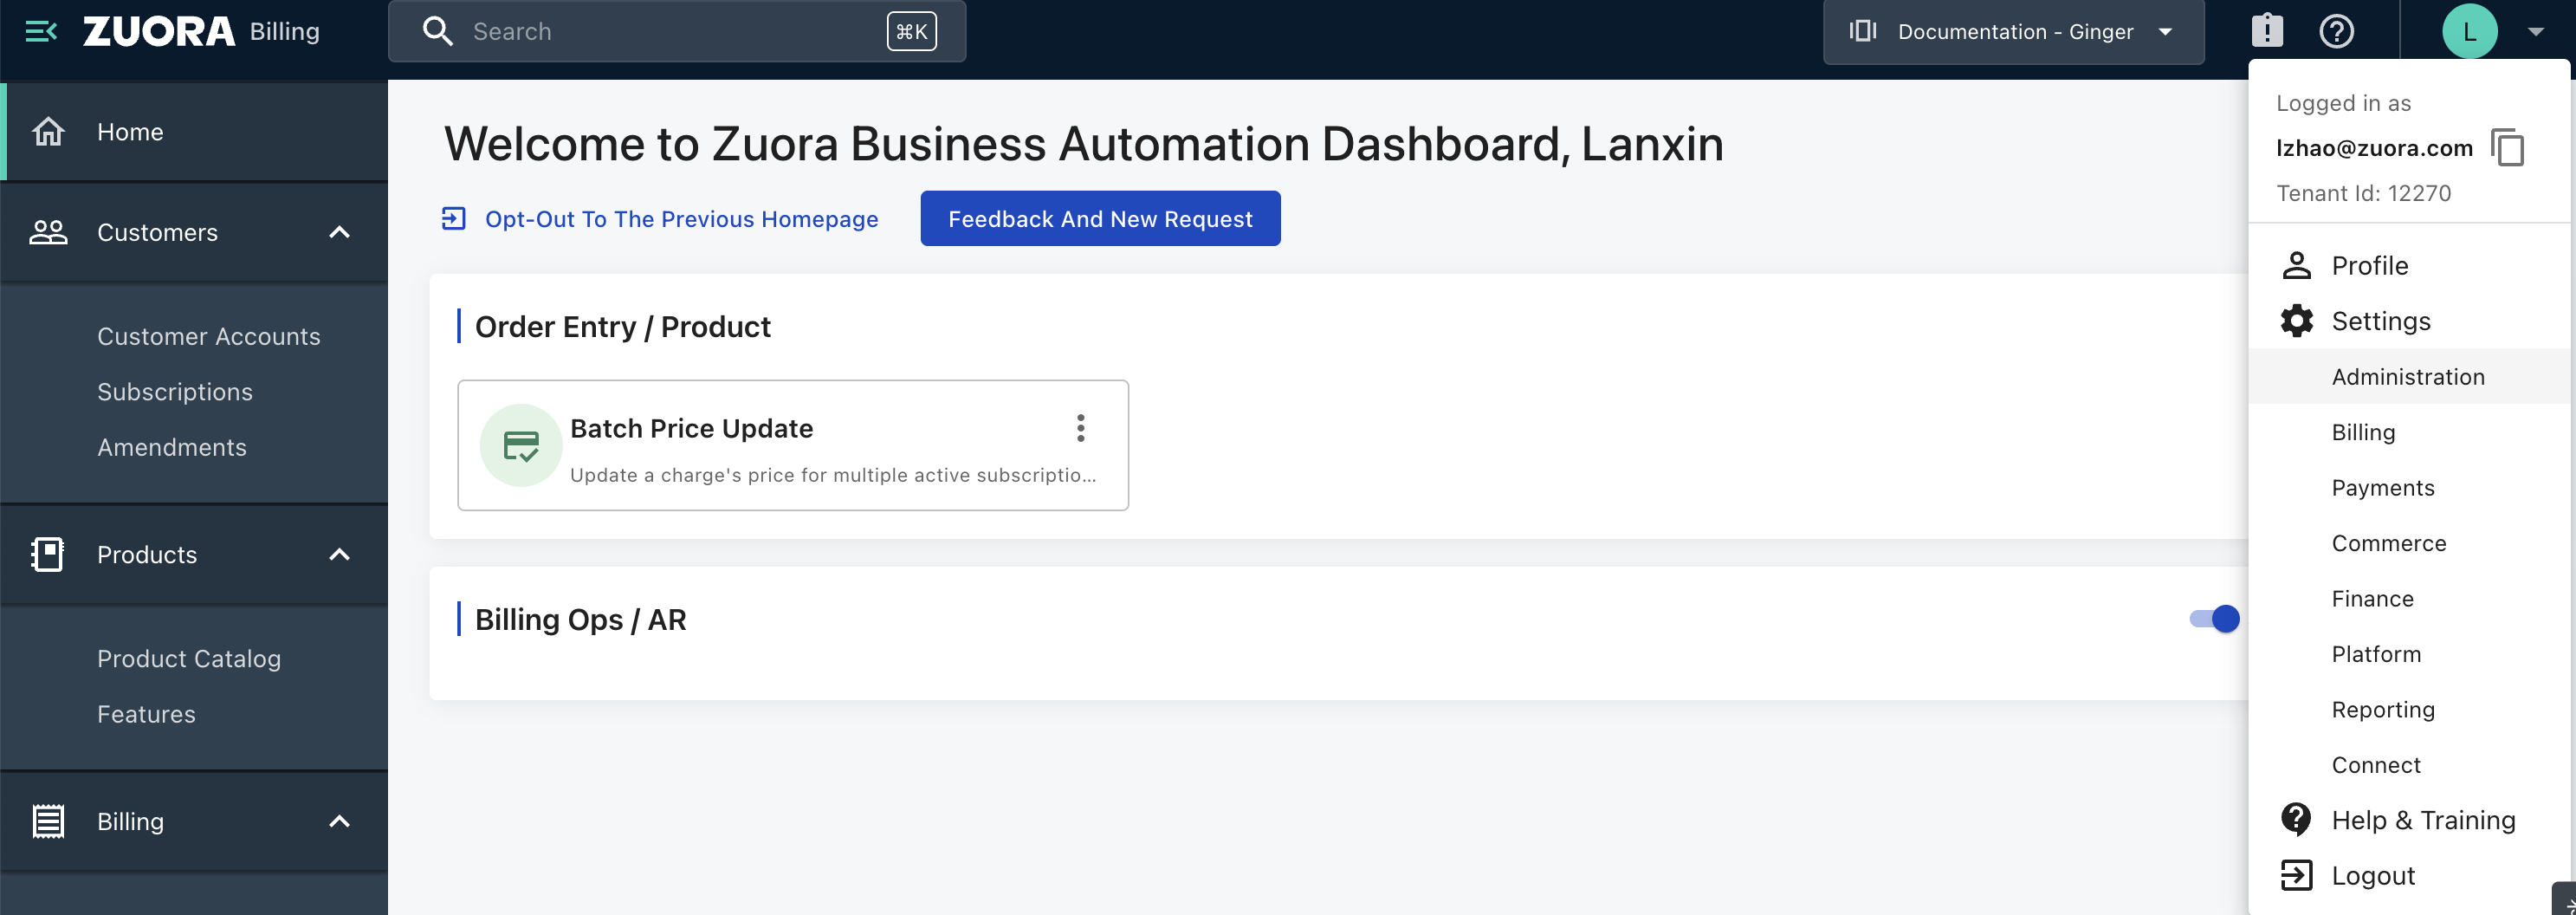
In the upper-right corner, you can find a green circle with your initial. Click it to expand a dropdown menu. If the dropdown includes Administration as the first option under Settings, you are an administrator and can self-provision your client ID and secret. Otherwise, contact your company's Zuora administrator.
Step 4
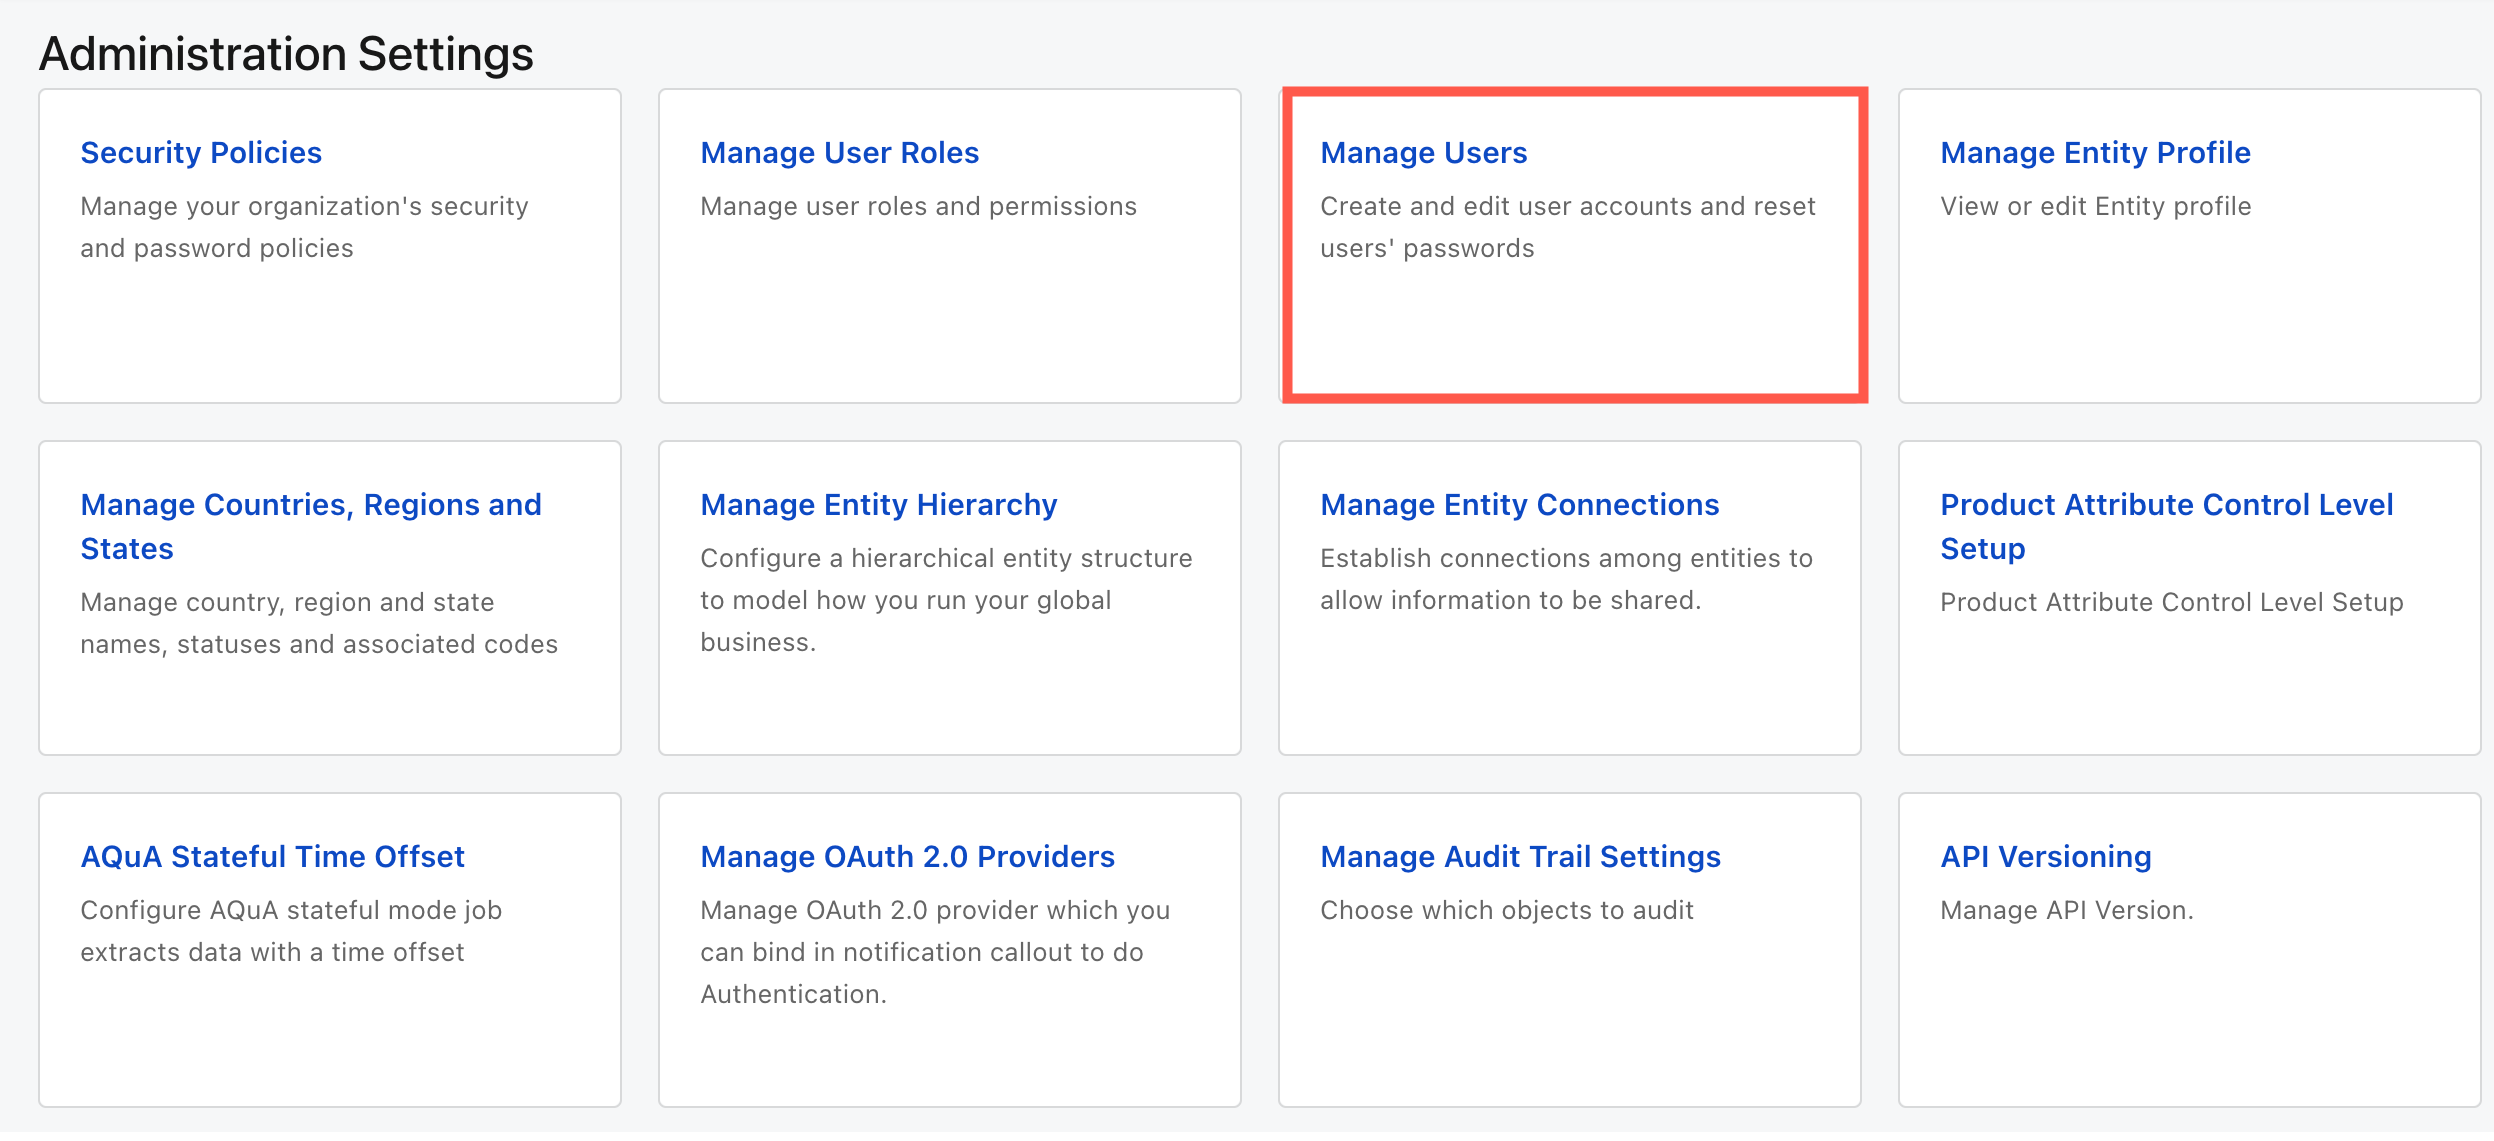
You or your administrator should click Settings > Administration, then click the Manage Users option.
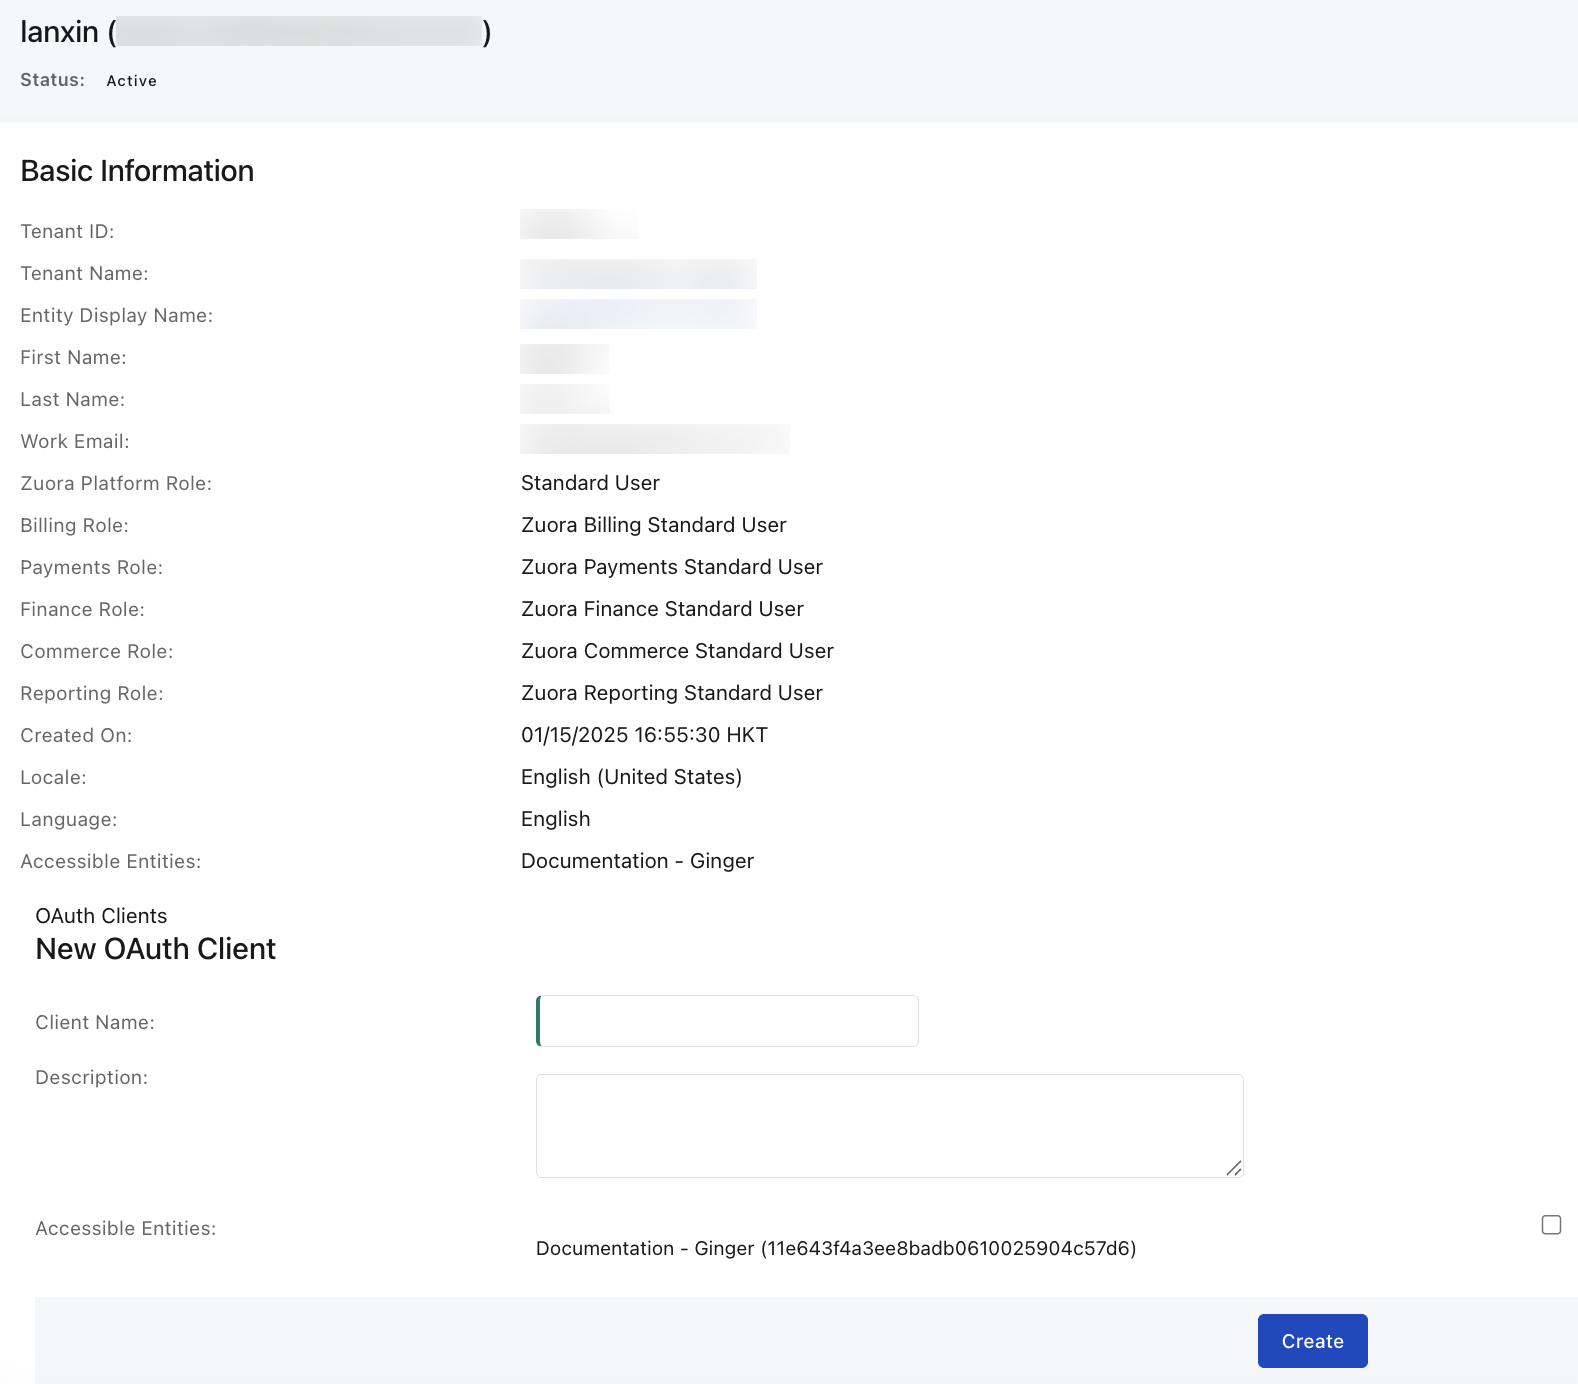
You will then see a list of all users within your tenant. Click your user name, and your user details including platform roles are displayed. See the following user details page for an example:
Step 5
At the bottom, you or the administrator can create an OAuth client ID and secret. Ensure you provide the desired client name and avoid generic names, try something project-specific. These clients accumulate over time, making tracking them challenging. After clicking the Create button, a dialogue displays the client ID and secret. The secret appears only once, so ask the administrator to copy and paste the entire text to share with you.
With your client ID and secret in place, you are ready to make OAuth calls. The final requirement is the correct REST endpoint. Accessing the wrong environment results in authentication errors.
Step 6
To determine the correct REST endpoint, examine the URL of the user interface. For example, on this page, the URL reads apisandbox.zuora.com.
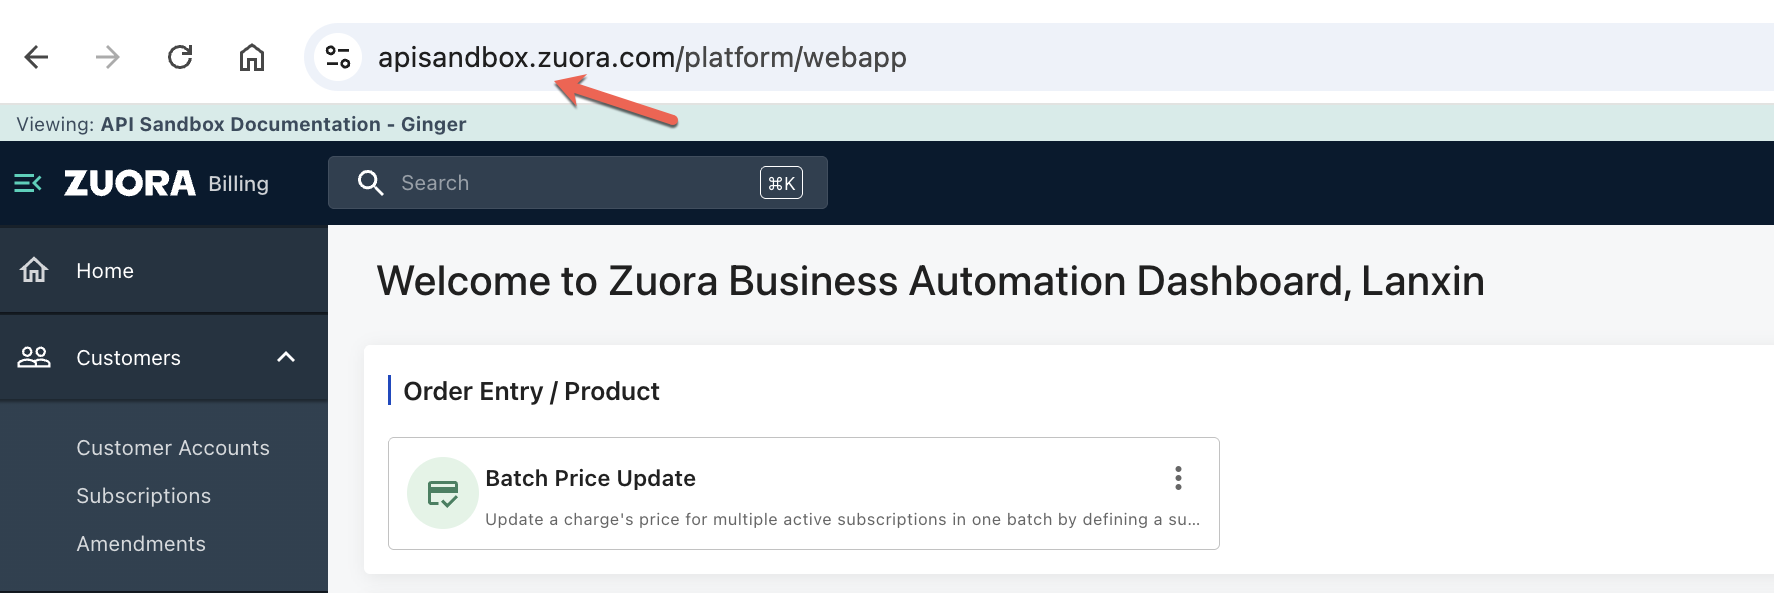
Using our secret decoder ring, the table below, match the middle column value and use the right column's REST endpoint. In this example, the correct endpoint for apisandbox.zuora.com is rest.apisandbox.zuora.com.
With your client ID, secret, and a call to create an OAuth token, you will obtain a token for your subsequent API calls.
Find The correct REST endpoint for your development tenant
-
Log into the Zuora UI and identify the URL root of the UI page in the
User Interface root URL
column. If the URL starts with
one.zuora.com, you should choose the tenant for which you have an OAuth client ID and secret first. Our Production tenants are intentionally absent from this table.
| Environment | User Interface URL root | REST root URL | SDK enum value |
|---|---|---|---|
| US Cloud 1 APISandbox | https://sandbox.na.zuora.com | https://rest.sandbox.na.zuora.com/ | SBX_NA |
| US Cloud 1 Central & Dev Sandbox | https://test.zuora.com | https://rest.test.zuora.com/ | CSBX |
| US Cloud 2 APISandbox | https://apisandbox.zuora.com | https://rest.apisandbox.zuora.com/ | SBX |
| EU Cloud APISandbox | https://sandbox.eu.zuora.com | https://rest.sandbox.eu.zuora.com/ | SBX_EU |
| EU Cloud Central & Dev Sandbox | https://test.eu.zuora.com | https://rest.test.eu.zuora.com/ | CSBX_EU |
| APAC Developer & Central Sandbox | https://test.ap.zuora.com | https://rest.test.ap.zuora.com/ | CSBX_AP |
Step 7
For details on the token call, see Create an OAuth token:
Tokens last one hour before needing a refresh. Avoid generating a new token for each call to prevent exceeding request limits. The comprehensive list of rate limits is also available at developer.zuora.com. Sticking with the previous example of a UI login using apisandbox.zuora.com, the following URL should return a token: https://rest.apisandbox.zuora.com/oauth/token
If you are getting unauthorized access errors, it is likely that you have the wrong combination of client ID and secret and tenant URL. Check the combination carefully and open a Support ticket by clicking on the "?" to the left of that green circle in the top right hand corner of the UI if you can't resolve your issue.
Summary
You should have the access you need for your API and SDK based development. Our client libraries for Java, Node.js, Python, and C# are available for your use. If you’re new to Zuora you might find the Billing FAQ and Payment FAQ answer many of your questions. Also you can access our Support team by clicking the question mark next to the green circle with your initial that we introduced in Step 3.
We hope this helps you obtain the necessary components. Provide feedback and reach out if you have any questions. In addition to Support, we have a Developer community for you to discuss issues with your fellow developers. There's no charge for these resources, though accessing the moderated Community will require you to register with a customer email address.